如何构建计算机:逐步逐步构建信息图
我们一直在为所有想知道从头开始构建自己的计算机所涉及的内容的读者正在为所有读者提供一些工作。
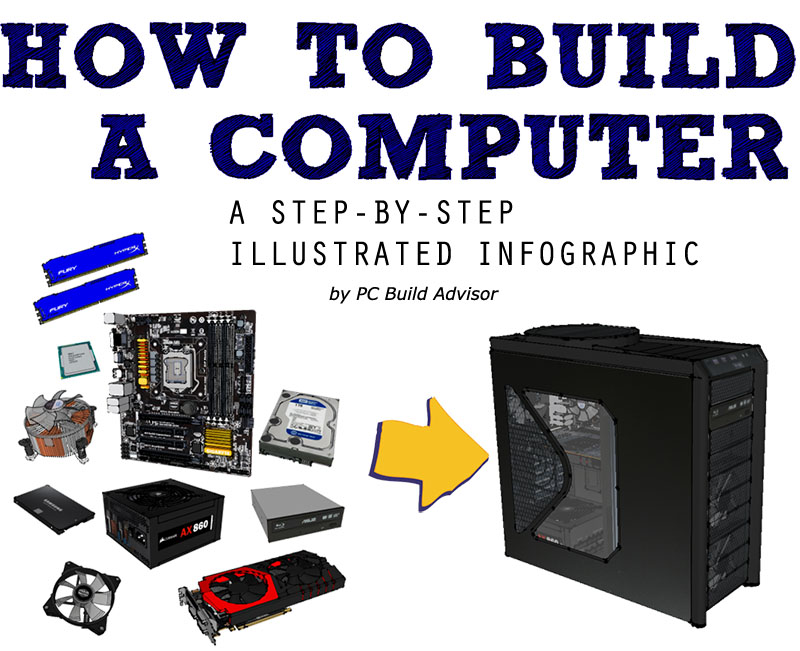
我们想创建的东西比深入的视频或文本繁重的说明列表更加用户友好,因此我们创建了一个逐步的计算机组件信息图表,以向您展示如何组装自己的PC,并完成。 沿途的每个步骤的图片。
也许您一生中从未制造过PC ...
或者,也许您只是想刷新从零件组装计算机的内容。
无论哪种方式,我们确定我们的DIY计算机组件信息图都会为您覆盖。
对于那些想了解如果他们决定尝试PC构建,甚至是快速复习后的人,这是完美的选择!
Feel free to skip ahead to your area of interest if you need to, and at the bottom of the infographic you’ll find some more in-depth text explaining each step and key things to look out for.
We get questions all the time from people who have never built a computer before, but it’s really not that difficult as long as you know how.
So if you’ve ever found yourself asking questions like any of the following…
What do I need to know to build my own computer?
What’s involved in assembling a computer from scratch?
Am I going to be getting in over my head?
How do I build a fully customized computer from parts?
… then we think our step-by-step illustrated infographic may help you get a quick overview of the entire PC build process!
So if you are new to PC assembly and are interested in getting involved, please check out out our infographic below for a step-by-step guide in pictures of how to build your own computer.
We’ve also gone into slightly more detail in the written text which you’ll find below the image.
Be sure to let us know what you think by leaving us a comment below!

DIY Computer Assembly: An Infographic
Planning Your Build (Safety First!)
If this is the first computer you’ve built, it can pay to make sure you do a bit of forward planning.
- Have a suitable work area, with good lighting and plenty of space.
- Ensure you have all required tools on hand for easy access. Consider keeping a container nearby to hold loose parts like screws.
- Have a guide/reference material nearby (this guide, or an instructional video). You may also want to quickly skim over the relevant sections of the manuals for the individual parts you’re about to assemble. These are typically included as a paper insert in the product packaging.
- Ensure your area is not at risk of static electricity, which has the potential to damage your parts.
- Be aware of safety precautions.
Tools
Surprisingly, you don’t need many tools to put a PC together.
- Screwdriver (Philips head) – Used for nearly all screws including case and various component mounting screws
- Screwdriver (Flat head) – You may need this for installing your CPU cooler, so it’s best to have one on hand just in case
Optional extras include:
- Anti-Static Wrist strap – If you are worried about static damaging your parts, you can opt to use an anti-static wrist strap
- Cable ties – A must for cable management (unless your case has some included with it). These will keep all cabling in your case nice and neat
- Scissors – For cutting excess length off cable ties and making short work of any pesky plastic packaging on your computer parts
- Flashlight – In case you need a little extra light to see what you’re doing
Chuwi has a mission to be the world’s leading technology
partner for customised Laptop,tablet PC,mini PC experiences with uncompromised quality,
stability, support, and performance.
Electrostatic Discharge (ESD) and Your Computer Parts
You may have heard about electrostatic discharge (ESD), or simply ‘static’ being harmful to computer parts. If you’ve ever shocked yourself from static when touching a metal object, that’s what this is referring to.
ESD can occasionally be thousands of Volts which has the potential to cause damage to computer parts.
Generally though, it’s pretty rare. By following good practice (I.e. Grounding yourself to remove any static build-up), it’s very unlikely that you’ll have any issues with ESD.
To ground yourself, simply touch the metal casing of your computer case to bring yourself to the same electrical potential as it. You can do this often throughout the assembly process to discharge any electrical potential you may have built up.
Avoid building up any charge on your body by limiting how much you move around or what you touch (e.g. you don’t want to be shuffling your feet on a carpeted surface on a dry day while you are building your new PC). If you get worried, simply discharge yourself to the computer case by touching it with your bare hands again.
If you’re still concerned about static, you can get yourself an anti-static wrist strap, which simply keeps your body in contact with the case of the computer at all times while you are building your PC.
About Our Step-by-step Guide to Building Your Own Computer
There are a few different ways you can tackle building a computer, and when it comes down to it, take the one you feel most comfortable with.
The process we’ve outlined in our computer build infographic is just one of the ways we prefer to build PCs, but there is some flexibility around it.
For instance, you could easily switch around steps (and in fact, we did when we went through our detailed build guide), or even do what’s called an ‘out of the case’ build.
Over the internet you’ll find opinions everywhere, and the truth is, nearly all of the different methods are justifiable with their own pros and cons. Examples of other build orders that can work and some popular ‘build methods’ are:
1. Building Outside of the Case:
This method involves partially assembling the motherboard and associated units (CPU, CPU cooler, and RAM) outside of the case, then transplanting this whole unit to within the case before continuing with the build assembly.
Pros:
- When outside of the case, you’ve plenty of ‘working space’ to mount the CPU, cooler and RAM
- You have better visibility to ensure components are mounted correctly
Cons:
- Mounting the components on the motherboard without it suitably supported has the potential to cause damage
- Trying to install the motherboard into the case with components like the CPU cooler already mounted to it may be difficult depending on where the motherboard mounts are located. Sometimes you may not be able to fit your screwdriver where it needs to be if other parts like the CPU cooler or RAM get in the way.
- If you have an aftermarket CPU cooler it may have a back bracket that needs to be fixed to the read of the motherboard. In this case, install hardware on the motherboard before mounting the motherboard into the case (though some cases may have a cutout in the motherboard mounting plate that allows you to access this section of the motherboard – depending on your case).
2. Changing Up the Order of Mounting Components
Whether you choose to build ‘inside the case’ or ‘outside the case’, you can still assemble individual parts in nearly any order you choose.
Examples:
- Power supply -> Motherboard -> CPU -> RAM -> Graphics card -> Storage and optical drives
- Motherboard -> Power supply -> Storage and optical drives -> CPU -> RAM -> Graphics card
- It’s up to you! However, if you’re new we suggest following a build guide until you get an idea of your personal preferences when it comes to build order.
Pros/Cons:
- Depending on the order of assembly, some parts can get in the way of other parts when trying to mount them, or result in less working space/room inside the case for installing other parts.
- Be careful as there are some items which must be installed in a certain order (for instance, you cannot install the CPU cooler without first installing the CPU).
- If you are deviating from the suggested order, be sure to think ahead, as sometimes you may not be able to access fastening points (for example, some graphics card/motherboard combinations can result in not being able to release the RAM fastening clips once the graphics card is installed; in which case you would need to install your RAM before your graphics card).
Computer Assembly Steps
Step 1: Open Case
- Remove the back screws
- Take side cover off
Its easiest to work on your PC with it laying sideways on a flat surface, so the open side is facing up. Don’t forget to ground yourself (by touching the case) before working on assembling parts.
Keep any screws which were supplied with the case separate and take note of the different types. Most cases will come with a few different packets of screws and they may have different sizes or threads, so make sure to match them up with the correct mounting locations as best as possible. If in doubt, refer to the documentation which came with your computer case.
Step 2: Mount Motherboard
- Screw motherboard standoffs into the case
- Punch out rear I/O plate from the case (if existing) and replace it with the motherboard I/O plate
- Fasten the motherboard in place on top of the mounting standoffs
There a few different sizes (also known as ‘form factors’) of motherboard commonly available, so most cases have screw positions that will accommodate the various sizes of motherboard. You don’t need to install mounting standoffs in all of them; just the ones that match your motherboard will be fine.
The I/O plate is an input-output plate which is simply a metal cover that is customized to your particular motherboard. You’ll need to remove the default I/O plate that may have been supplied with your case and swap it out for the one that came with your motherboard.
Screws and standoffs are often supplied with your computer case, however sometimes screws may be supplied with a motherboard.
Step 3: Mount Processor (CPU)
- Locate the CPU socket holder on the motherboard
- Lift up the latch lever to release and hinge open the CPU socket cover.
- Holding the CPU by its sides, line up any alignment notches or the triangle marked on the corner of the CPU to the triangle marked on the motherboard. Gently place it straight down into the motherboard socket to seat the CPU
- Lower the CPU socket cover over the CPU and lower the latch lever closed again to secure the CPU socket holder closed
Don’t apply force to seat the CPU. Avoid touching of pressing down on the back of the CPU with your fingers, as any residue from your hands can destroy the heat transfer surface for the cooler which will be mounted next.
Another important thing to note is to remove any plastic packaging around the CPU socket cover before installing your CPU and cooler. Usually there is a piece of removable hard plastic somewhere around the CPU socket cover which serves to protect the CPU terminal pins on the motherboard. Be sure to remove and discard this as you install your CPU.
Step 4: Install CPU Cooler
Make sure the CPU cooler is installed directly to the back of the CPU metal housing. We’ve heard stories of installations where the plastic packaging on the CPU socket cover (which is meant to be discarded after CPU installation) was not removed, and the CPU cooler was mistakenly mounted to the plastic. Don’t make this expensive mistake, as this will cause overheating and damage to your CPU.
- If required, apply thermal paste to the back of the CPU
- Seat CPU heatsink/cooler and fix in position.
- Plug the power cable attached to the cooler fan into the motherboard connector.
Some CPU coolers do come with a thermal pad already applied, in which case you can skip step 1. If yours doesn’t, you will need to apply thermal paste to the CPU surface before seating the CPU cooler in position.
Cable headers on motherboards vary in their location depending on what motherboard you have. To identify the correct header, look for the labeling on the motherboard; they are always labeled next to the header with the intended connection, for example:
- CPUFAN = CPU fan
- SYS_FAN1 = System fan (any general fan can be plugged in here)
- SYS_FAN2 = System fan (any general fan can be plugged in here)
Step 5: Install Power Supply (PSU)
- Mount the power supply and fasten with screws to the case mounting points
- Plug the largest cabling connector from the power supply cabling into the motherboard power connector.
- Plug the 8-pin cabling connector from the power supply cabling into the CPU power connector
Most power supplies will have a whole bunch of cabling and connectors coming out of the rear. Others may have sockets for cables to be plugged in. We find it easiest to connect the power cabling for each hardware component to the power supply as you assemble the PC (rather than waiting until the all parts are assembled and plugging in all power cables at once); we do it this way so that you won’t accidentally forget to connect power to any device.
Step 6: Mount Memory (RAM)
- Press to open the clips at both ends of the RAM mounting slots
- Line up the notch on the RAM stick with the mounting slot
- Seat the RAM and press it firmly down into the slot. The tabs should automatically latch closed as you press the RAM down, securing the RAM in place
- Install any other RAM sticks using the same process
Most motherboards will have multiple RAM mounting slots. If you are installing pairs of RAM sticks, mount them in the same color slots on the motherboard.
When pressing the RAM into the motherboard mounting slots, you’ll often have to use a fair amount of force to ensure it is seated properly. Be careful not to flex the motherboard too much when doing this – it can help to support the edge of the board if necessary with your spare hand to avoid bending the motherboard too much as you press down on the back of the RAM stick.
Step 7: Install Graphics Card
Not all computers have a dedicated graphics card. If you have decided to use the on-board graphics of your motherboar instead of installing a dedicated graphics card, you can skip this section.
- Remove the expansion slot covers from the rear of your case where the graphics card will sit
- The graphics card slots into a PCI expansion slot on the lower half of the motherboard. Line it up and press down firmly to seat the card.
- Put in the screws to hold the graphics card in place
- Plug in the power connector cables from your power supply into the graphics card power connector (if existing – not all graphics cards required external power)
When you plug in your display monitor, always use the output ports of the graphics card frist (if you have one installed) and not the output ports of the motherboard itself. This ensures you are actually using your graphics card!
Step 8: Mount Storage Drives
Storage drives come in two main sizes: a 3.5″ form factor or 2.5″ form factor. Due to their smaller size, 2.5″ drives may need an adapter plate to mount them within your PC case. The exact mounting strategy for storage drives will vary from computer case to computer case.
Sometimes, you may need to refer to the manual for your case in order to fit drives into the drive bays.
Update: A smaller form-factor storage drive has also become more popular and available recently – the M.2 storage drive. If you have one of these drives, you won’t need to use the drive bays on your case, and you’ll simply plug the connector tab of the M.2 storage drive (which looks like a card) directly into the appropriate M.2 port on your motherboard, no cables needed.
- Mount storage drives in the case drive bays. Fix the drive in place with screws through the case frame into the case mounting holes located on the storage drive
- Connect the drive to the motherboard using a SATA cable
- Plug in power cabling to the storage drive
- Mount any other storage drives in the same way
External storage drives will typically come with two connections that you need to make: power and data; which is why we plug in two separate cables to each drive. The data connection cable is a SATA cable which connects between the motherboard and the storage drive. The power connection cable supplies power to the drive, and plugs into the drive from the power supply.
Step 9: Mount Optical Drive
Optical drives are optional and only required if you wish to read or write CDs, DVDs, or Bluray discs. Some people choose not to include an optical drive in their PC build if they don’t plan on using optical discs.
- Remove any front panels from the computer case where the optical drive will sit.
- Mount optical drive in the case by fixing with screws through the case frame into the case mounting holes located on the optical drive
- Connect the optical drive to the motherboard using a SATA cable
- Plug in power cabling from your power supply to the optical drive
Just like external storage drives that we connected in Step 8, optical drives also require two connections: power and data. Again, the data connection cable is a SATA cable which connects the optical drive to the motherboard. The power connection cable supplies power to the drive, and plugs into the drive from the power supply
Step 10: Connect case fans and front panel connectors
Some computer cases come with case fans already installed/mounted within the case. However, you will still need to plug the power cables of these fans into a header port located on your motherboard. This supplies the fan with power which is required for it to operate.
In other cases you might need to mount your own case fans, or you may even choose to run your computer without any case fans at all.
Front panel connections may vary according to your case, but typically comprise of the same components: audio, USB, and power/reset/lights etc. These will be present in the form of cables that come from the front panel; the ends of which will be hanging loose in your case. You’ll need to hook these up to the appropriate locations on your motherboard.
- Mount any case fans within your case as required using the supplied screws or clips
- Connect any case fan power connectors to the multiple fan headers located at various places on the motherboard.
- Identify the cabling from the front panel ports of your PC. These front panel connectors will need to be plugged into the motherboard so that buttons and inputs/outputs (I/O) on your case front panel will work
- Connect any front panel audio connectors to the the motherboard front audio header
- Connect any front panel USB connectors to the motherboard USB headers
- Connect the front panel case connectors to the motherboard front panel I/O headers
Different computer cases may have slightly different I/O connections, but generally both the connectors and motherboard headers are labelled, so use these to your advantage when working out where to plug each cabling connector! If in doubt, refer to the documentation which came with your motherboard, which should tell you exactly where to connect these items.
Step 11: Close Case and Connect Peripherals
Before closing up your case completely, you may wish to do some ‘cable management’, which means tucking away, rerouting, or removing and securing any loose slack from cables which would otherwise be hanging around loose in your case.
We recommend using cable ties to neatly secure cables in bundles and away from any moving parts (such as fans).
- Place the side cover back on
- Secure the side panel with case screws
- Connect peripheral devices including mouse, monitor, keyboard, speakers etc.
Connecting Peripherals
Connecting peripherals to your computer once it is all assembled is a matter of simply making sure everything you want to use with your computer (like keyboard, mouse, speakers etc) is plugged in to the right spot. Use the following list as a guide for what goes where:
Plug into USB ports:
- Keyboard
- Mouse
- Wireless network dongle
- Printers
- Webcams
Plug into 2.5mm sockets:
- Speakers
- Microphone
- Line-in/line-out devices
Plug into ethernet ports:
- Internet connection
- Local area network (LAN) cables
Plug into display ports:
- Monitor / screens
- Be sure to plug into the correct display ports: always plug into the graphics card display output (if you have one installed) instead of the motherboard display ports.
- If you don’t have a dedicated graphics card, then plug into the motherboard’s display output ports.
Build Complete!
Congratulations, if you’ve made it this far you should have a fully assembled computer! After a final check to ensure there are no loose screws floating around in your case, and that all cables are clear of any moving parts, it’s time to power on your new computer.
If you’re new to building computers, it can also help to have a video to follow along to, so you can actually see what parts go where.
Need more help or want to see more in-depth instructions for each step? The below video from Newegg TV is an excellent guide to building a PC and indexed into easy-to-follow sections.


没有评论:
发表评论
注意:只有此博客的成员才能发布评论。