#1. Ringtone Designer 2.0
Ringtone Designer is enriched with lots of features through which you can make your custom ringtone, alert tones as well as text tones. All these ringtones you can design right from your music library, you don’t have to pay for it. It’s accessible to the interface is easy to understand and make ringtones conveniently.
All you have to do is select the song and then select the appropriate length of the tone and choose your favorite part of that song, and that’s it. You can only create ringtones with Ringtone Designer 2.0 once you sync the app with iTunes to include the tones direct in the settings category of iPhone XS Max.
Get it: Download Ringtone Designer 2.0
#2. Ringtone Maker
Want to make custom tones for your iPhone XS Max, then Ringtone Maker is one of the best ringtone apps for iPhone XS Max. Creating custom tones using ringtone maker is the less than one minute process, select the music, and from that, a short clip and your ringtone is ready to use.
Few critical features of Ringtone Maker for iPhone XS Max are easy to control end and start time, Fade in and out, Accurate operating buttons and much more. So make unlimited tones using this incredible ringtone maker for iPhone XS Max.
Get it: Download Ringtone Maker
#3. Ringtone Designer Pro 2.0
Ringtone Designer Pro 2.0 is leading ringtone app for iPhone XS Max in more than 30 countries, and it has achieved number #1 position among all the paid ringtone apps for iPhone XS Max.
There is no need to buy ringtone while you can make your unlimited tones using ringtone designer app. Although, it allows you to create unlimited emails tones and text tones with that same quality of that song. Once you make your first ringtone using this app, you will get text tone package free of cost from TextRocker.com.
Get it: Download Ringtone Designer Pro 2.0
#4. Ringtones for iPhone
Trim and cut the songs and make unlimited ringtones for your iPhone XS Max in seconds using Ringtones for iPhone app. It can convert MP3 and AAC music files to the tones, and besides, you can also make ringtones of your friends or family member’s voice by recording.
You can even share the ringtones that you have created using this app. Go to the App Store and install ringtone maker in iPhone XS Max and know more about its unique features.
Get it: Download Ringtones for iPhone
#5. ZEDGE Ringtones
ZEDGE Ringtones app is a vast collection of all type of ringtone available for download. Like other apps you don’t have to create the ringtones in this app, browse the category of the tone and download it and set it as ringtone in your iPhone XS Max. Classic ringtones, fun sounds, music and everything you will get in high quality from ZEDGE Ringtones.
Ringtones, Notifications tones, Text tones, and alarm tones are available in ZEDGE Ringtones.
Get it: Download ZEDGE Ringtones
#6. Scary Ringtones+
It’s time to scare your friends and colleagues every time while your iPhone XS Max rings. Some of the best scary ringtones for iPhone is available in this Scary Ringtones+ app.
You don’t need to purchase any ringtone while using this app; you can download unlimited scary ringtones for your iPhone XS Max. Using this app, you can customize tones of iPhone in reminder alert, calendar alert, ringtone, mail alert and much more.
Get it: Download Scary Ringtones+
#7. Audiko Ringtones Free
Audiko app is a combination of most popular tones and wallpapers for iPhone XS Max. You can only set different wallpapers along with creating unlimited ringtones with Audiko Ringtones app.
To make ringtones doesn’t require any special skills or you don’t have to spend more time to create custom ringtones from iTunes music library while using the Audiko Ringtones app. Let’s get started and make your custom ringtones without any compromises.
Get it: Download Audiko Ringtones Free
Gihosoft Photo Eraser Erase unwanted objects and perfect your amazing photos!
If you lost data after you updated to a new iPhone, you can always use Gihosoft iPhone Data Recovery to get the data back from the old iPhone or backup.
Jihosoft Photo Eraser
Free iTunes/iPhone Backup Extractor for iPhone, iPad
iPhone Backup Extractor - Extract Data from iPhone Backup
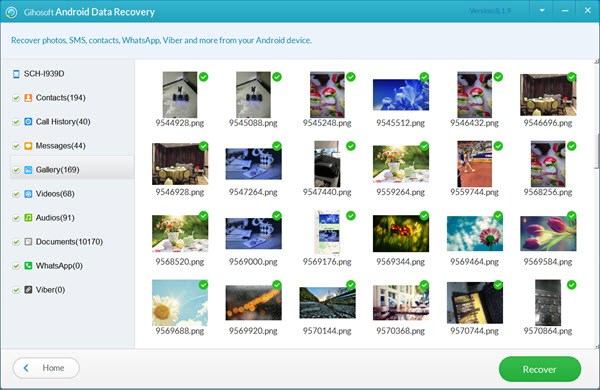
Jihosoft Android Data Recovery: the best Android Data Recovery software for Windows and Mac to recover deleted contacts, messages, photos, videos, WhatsApp and etc from Android devices.
Gihosoft Android data recovery Free is a super awesome software specialized in Android file recovery. With this program, you are able to recover deleted photos, music, videos, messages, contacts, call logs, WhatsApp messages, Viber chat history and more from Samsung, Huawei, LG, HTC, Motorola, Google, Oneplus, Sony, Lenovo, ZTE and other Android devices directly.
Worth reading:download youtube 1080p


 Popcorn Time is a
  Terrarium TV is an app that I promote amongst my social circle all the time! This service boasts of an enormous content catalog, filled with movies as well as TV shows, both, old and new which are incredibly easy to browse. It works a bit differently compared to Popcorn Time in that it indexes streaming links to the media you’ve selected to watch from the www. Usually, there aren’t many issues as far as buffering is concerned but its recommended to use links from Google Video, CDN Fast Server, Streamango, and Afdah since they’re a lot faster than the others. Similar to Popcorn Time, Terrarium TV also let’s you watch content in HD, with or without subtitles. The best part? It has a wide range of device support other than Android including Chromecast and Fire TV Stick.
 If you are looking for an app that not only performs like ShowBox but also resembles the service (except for its blue color scheme), then PlayBox HD is worth a try. This widely popular app allows you to stream all types of content including movies, cartoons, TV series, anime in up to HD quality for free. The UI on this app is as simple to use as on ShowBox so if you’ve used the latter then figuring things out will barely take a couple of minutes. Aside from Android, the app can also be used on an iOS device.
 Yet another app with the look and feel of ShowBox, Movie Box enables users to not only
  CinemaBox sports a super attractive design and layout that performs equally well. This app is a solid contender to ShowBox by virtue of its vast collection of all the newest TV and movie releases available for streaming in HD. A feature that I think many users will appreciate is the “Kids Mode”. As the name suggests, this mode allows users to keep their kids off of any content that they may deem as inappropriate for children. Also, much like Movie Box, CinemaBox also let’s you download select content for offline viewing. Aside from Android, the app supports platforms like Apple TV and Google Chromecast.
 MegaBox is also loved by a lot of entertainment fiends by virtue of its close semblance to ShowBox. Be it the interface, the design, the content, or any other features, the two services are quite alike. MegaBox is said to be backed by a solid server that eliminates any issues related to slow load times and lags. This means that you can enjoy a smoother streaming experience. But, the speed will also depend upon your internet connection. You can stream content in various resolutions including 360p and 720p, based on the speed of your Wi-Fi.
 Not comfortable using an unofficial service with a legality in the grey area? Sony Crackle is a great option that’s totally free and legal. It features a host of good quality movies and TV series across genres like Comedy, Drama, Sci-Fi, Crime, Horror, and Action. The content is sourced from big industry names like FOX Digital, The Walt Disney Co., Warner Bros., Universal Studios, and the like. The best part? This service is available in 21 countries around the world, in three languages including English, Spanish, and Portuguese.


