The 20 Best iPhone XS and iPhone XS Max Tips & Tricks

The new iPhone XS and iPhone XS Plus are here. They mark the second iteration of the new, gesture-based interaction model that Apple started using with iPhone X. If you’re jumping from an iPhone 8 to an iPhone XS, you’ll find that a lot of things are different. Instead of a Home button, there’s a gesture-based Home bar. And that’s just the beginning. Start mastering your new device with some the top tips and tricks for iPhone XS and iPhone XS Max.
Best iPhone XS and iPhone XS Max Tips & Tricks
1. Unlock and Home Gesture

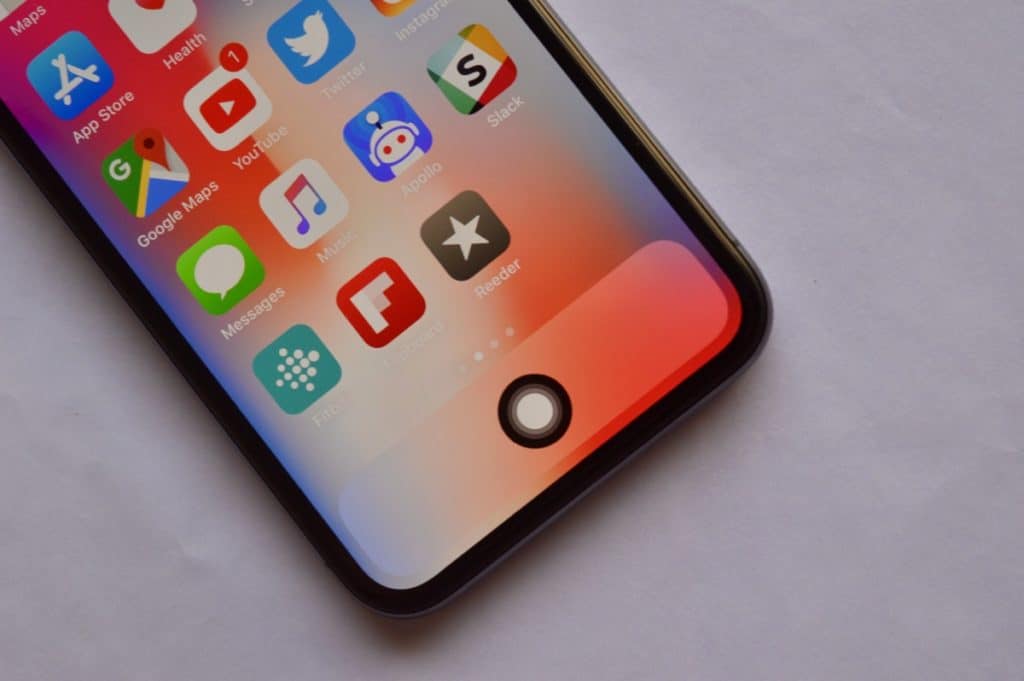
If the iPhone XS is your first iPhone without the Home button, you’ll need to spend some time getting used to the new gestures. But they’re quite easy to pick up and in no time, you’ll be like “Home button? Who?”.
Just swipe up from the Home bar to unlock your device or to go to the Home screen when you’re in an app.
2. Access The New Control Center

Control Center: Swipe down from the right edge (the right ear next to the notch), to access the Control Center.
3. Notification Center Gesture
Notification Center: Swipe down from the notch to access Notification Center.
4. Paying with Apple Pay
Apple Pay: Double tap the Side button to start the Apple Pay process to pay in the App Store.
5. How to Use Siri on iPhone XS
Tap and hold the Side button to talk to Siri. Or just say, Hey Siri.
6. App Switcher Gestures
Swipe up from the Home bar and wait a bit to open the App Switcher.
Force Quit apps: From the App Switcher, just swipe up a card to force quit an app.
7. Swipe Up Again for Face ID
Face ID in iPhone XS is faster, but sometimes it’s still going to fail. But don’t worry, getting Face ID to try once again isn’t as frustrating on iOS 12. Now, after a failed scan, you can just swipe up again from the Home bar to scan again.
8. Add a Second Face to Face ID
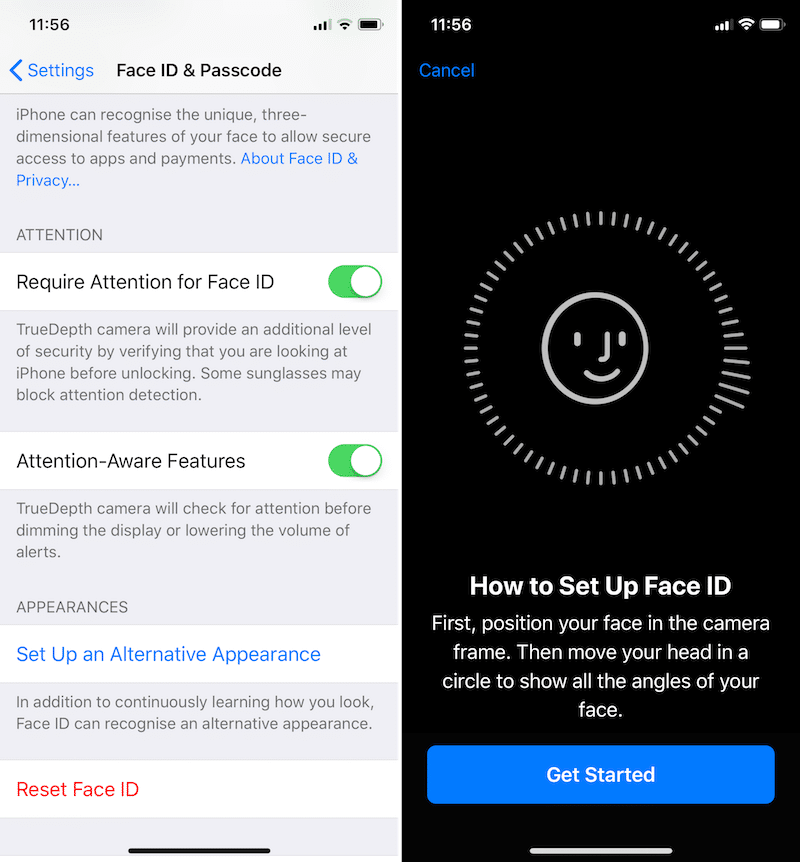
It’s a workaround, but you can now have two people using Face ID for the same phone. If you share your phone with your spouse, your life just got a lot easier. Open Settings -> Face ID & Passcode and select Set Up an Alternative Appearance. Follow the prompts on the screen to set up another face.
9. Get The Home Button Back
If you’ve come from an iPhone 7 or iPhone 8, you might be missing the Home button. While you can’t get a physical Home button back, there is a way to use a software Home button on the iPhone XS using an Accessibility feature.

Go to Settings -> General -> Accessibility -> AssistiveTouch and define shortcuts for single tap, double tap, long press and 3D Touch for the AssistiveTouch button. For Single touch, define it to go Home. You can use define other gestures features to define features you find difficult to access.
10. Create Your Own Memoji
iPhone X introduced us to Animoji. Animated emoji characters that responded to your facial expressions. The iPhone XS and iOS 12 take this a step further. You can now use Memoji to create your own Animoji character. This is similar to Bitmoji, only way better.
Because once you’ve created a character that looks like you, you can send it as a sticker, record a video as your character, and even superimpose the Memoji on your face to take a selfie as your Memoji character!
11. Edit Depth Effect From Portrait Mode Photos
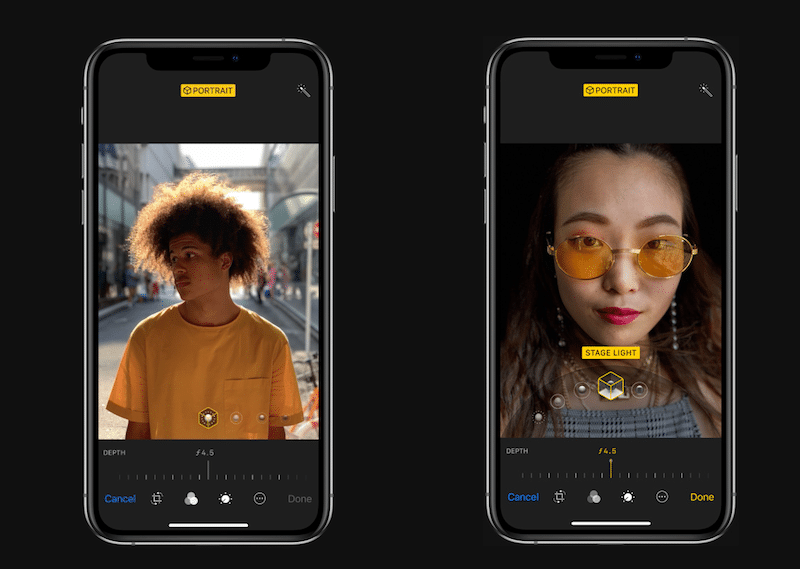
The iPhone XS vastly improves how Portrait Mode photos are captured. Not only does it have a much better bokeh effect, but you can also now go in and edit the background blur for any portrait mode shot later on.
Go to Photos, select a Portrait Mode photo and tap on Edit. Now, you’ll see a slider below that will let you change the background blur from f/1.4 to f/16 aperture.
12. Record Videos in 4K
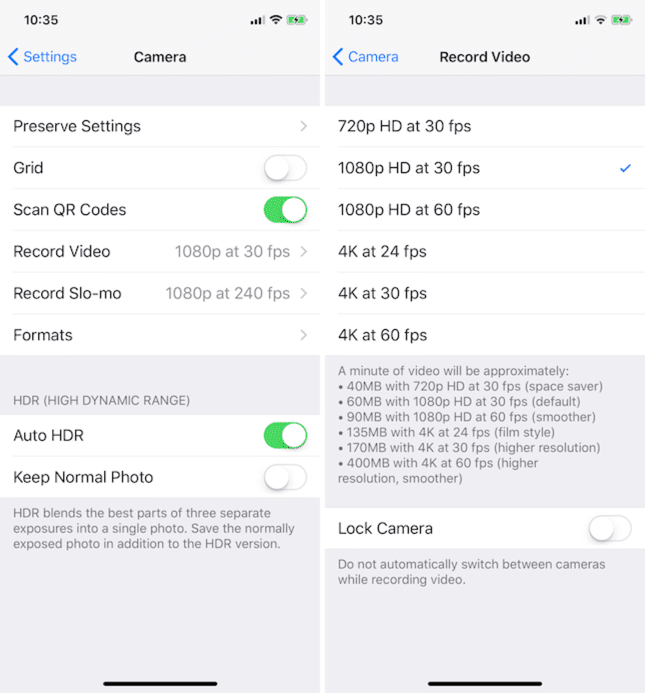
The iPhone XS now lets you record audio in stereo mode! But the default video recording resolution is still set to 1080p. If you want to make use of the awesome new camera, you should try capturing footage in 4K. Go to Settings -> Camera -> Record Video and switch to 4K.
13. Use Third Party Password Manager
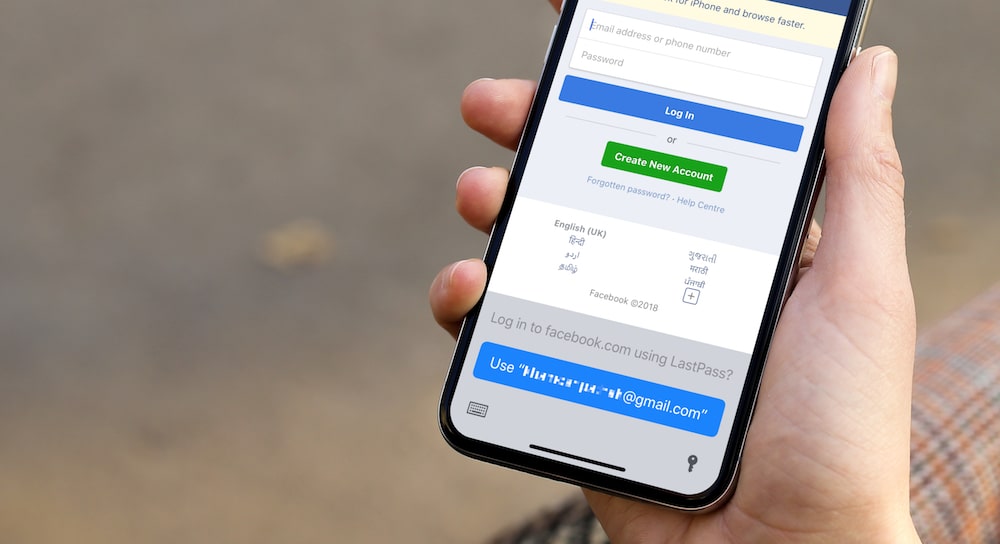
If you use LastPass or 1Password to manage your passwords on the Mac or PC, your life on iPhone just got a whole lot easier. iOS 12 now allows third-party password managers to integrate into iOS 12’s password autofill feature.
Go to Settings -> Accounts & Passwords -> AutoFill Passwords and enable the app. Next time you go to a login screen, you should see a suggestion to autofill the login details right above the keyboard. Tap on it, and in a second, your Face ID scan will authenticate and you’ll be logged in!
14. Get a Fast Charger

Sadly, the thousand dollar iPhone XS still doesn’t come with a fast charger. The thing is that Apple officially supports Fast Charging now, and they even sell adapters with a higher power rating.
If you’ve got an iPhone XS Max, you might seriously want to look into fast charging. Because charging that massive battery with a 5W charger is going to take ages.
There are multiple ways to do this. The cheapest way might be to use the iPad’s 12W power adapter. It will charge your iPhone up to twice as fast. And if you’ve already got an iPhone, you don’t need to shell out any extra cash either.
If you want to do this properly though, you need to buy two things: Apple’s 29W USB-C power adapter ($49) and Apple’s USB-C to lighting connector ($29). But that can be quite an expensive combo. You can use a third-party adapter and a cable, as long as it’s rated for USB Power Delivery.
We recommend you check out Anker 30W USB-C Wall Charger (at $25, it’s half the price of Apple’s official adapter).
15. Buy a Lighting To Headphone Adapter

You might have noticed already, that your shiny new iPhone came without a Lighting to 3.5mm headphone adapter. Apple has bundled one on new iPhones since iPhone 7 but now, that’s no longer the case. If you’ve already got AirPods or you use Apple’s EarPods anyway, you might not need the adapter.
But for most people, it’s good to have, as a backup. You might need it in your car, one when you’re plugging into speakers at a friend’s house. Apple will sell you a lighting to headphone adapter for $9.
16. Use Landscape Mode on iPhone XS Max
The iPhone XS Max qualifies as a Plus mode, so it supports the landscape mode for apps. When you’re in apps like Calendar or Settings, put your iPhone in landscape mode. You’ll instantly switch to the two column view! For example, in the Notes app, you can scroll the notes in the left panel and view the content of the note in the right.
17. Use iPhone X Case on Your iPhone XS
As the dimensions of the iPhone XS are exactly the same as the iPhone X, you’ll be able to use the same cases.
18. Shoot RAW Photos
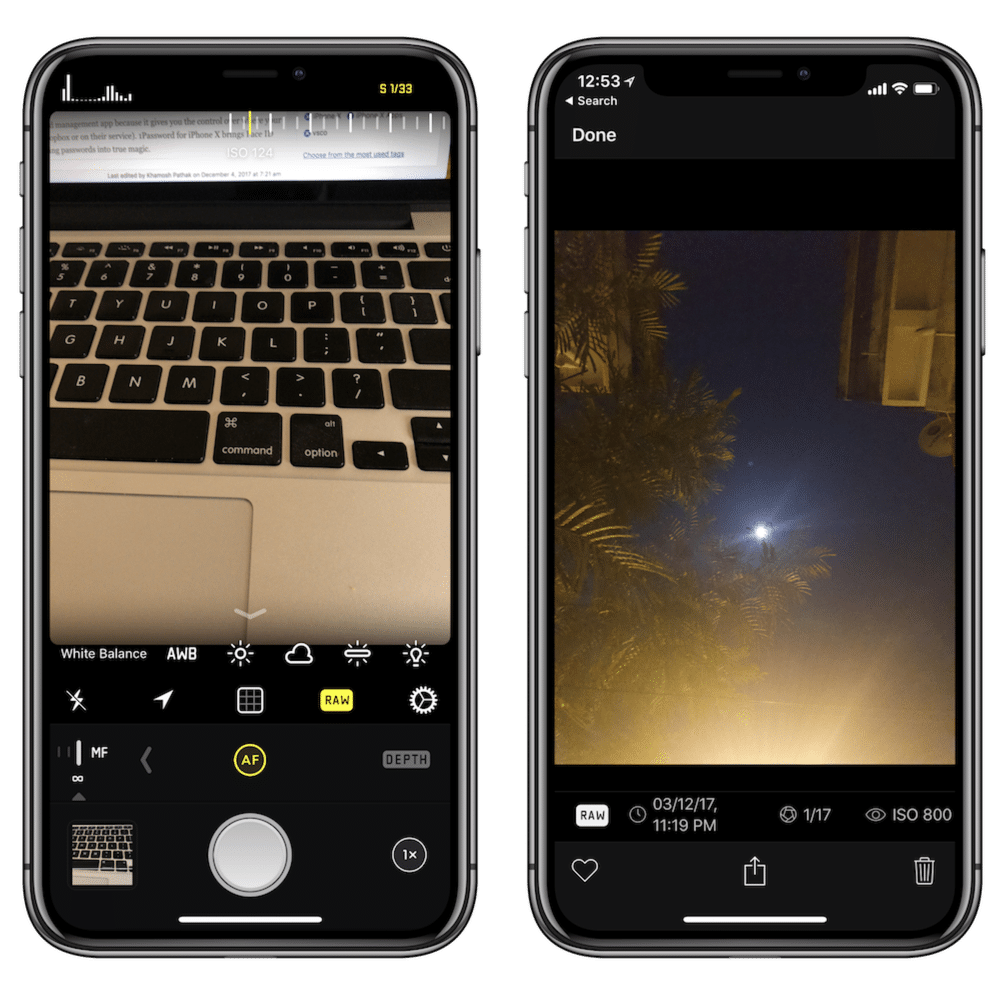
The iPhone XS takes amazing pictures thanks to the new Smart HDR mode. But what if you want to take matters in you own hand? Use an app like Halide to capture images in RAW format, with manual controls. You can set the exposure, focus, brightness, and more. The app also has an amazing Depth mode.
19. Edit Photos To Make Them Better

You’ve got photos from Smart HDR mode or from Halide. They’re pretty good, but you can make them even better using a photo editing app. Snapseed and Darkroom are our favorites. Both are intuitive to use. Darkroom has an amazing collection of filters to choose from.
20. Automate Tasks Using Siri Shortcuts

Your iPhone XS comes with a built-in automation tool called Siri Shortcuts. Go to Settings -> Siri & Search -> All Shortcuts and you’ll see a list of actions from all installed apps that you can create a Siri shortcut for. Record a phrase for Siri and the next time you say the magic words, your iPhone will do the task for you. It can be resuming a podcast in Overcast or marking an activity as Complete Streaks.
And you can take things to the next level by downloading Apple’s Shortcuts app from the App Store. Here, you can create complex workflows that will do multiple tasks, one after the other. All initiated by talking to Siri.
Gihosoft Photo Eraser Erase unwanted objects and perfect your amazing photos!
If you lost data after you updated to a new iPhone, you can always use Gihosoft iPhone Data Recovery to get the data back from the old iPhone or backup.
Jihosoft Photo Eraser
Free iTunes/iPhone Backup Extractor for iPhone, iPad
iPhone Backup Extractor - Extract Data from iPhone Backup
Jihosoft Android Data Recovery: the best Android Data Recovery software for Windows and Mac to recover deleted contacts, messages, photos, videos, WhatsApp and etc from Android devices.
Gihosoft Android data recovery Free is a super awesome software specialized in Android file recovery. With this program, you are able to recover deleted photos, music, videos, messages, contacts, call logs, WhatsApp messages, Viber chat history and more from Samsung, Huawei, LG, HTC, Motorola, Google, Oneplus, Sony, Lenovo, ZTE and other Android devices directly.


Do you need to increase your credit score?
回复删除Do you intend to upgrade your school grade?
Do you want to hack your cheating spouse Email, whatsapp, Facebook, instagram or any social network?
Do you need any information concerning any database.
Do you need to retrieve deleted files?
Do you need to clear your criminal records or DMV?
Do you want to remove any site or link from any blog?
you should contact this hacker, he is reliable and good at the hack jobs..
contact : cybergoldenhacker at gmail dot com
I can’t say much but with my experience through divorce, I had no one until I met hackingsetting50@gmail.com online then I contacted him, surprisingly he helped me hack into my partner's phone and all his social media platforms and i can now access everything and even documented and printed stuffs to show as evidence , now I’m happy with my kids and working for Riches. I hope this helps anyone in need.
回复删除Thanks.